The National Weather Service (and a few other agencies) often request hydro-meteorolgical data collected by DataWise® to be forwarded to them in SHEF-encoded format. The DataWise® software suite provides tools for generaating and distributing files containing data in SHEF-Encoded format.
To configure DataWise® to generate and deliver SHEF-Encoded Data Files, select SHEF from the Configure drop-down menu. The following dialog will be displayed:

The fields in this form are defined as follows:
Target #                          ... The instance of the SHEF-Encoded file to be generated.
Target Label                      ... A descriptive label
FTP Server Address                ... The IP Address or Name of the FTP server that is to receive the SHEF-Encoded files
Login ID:                         ... The User-name for logging into the FTP server
Password:                         ... The password associated with the above Login ID
Execution Frequency (minutes)     ... The frequency at which to generate and distribute the SHEF-Encoded file
TimeZone                          ... The time zone that the time-stamps of data are in (e.g., PST8)
Delivery Method                   ... How the SHEF-Encoded files are to be delivered
Encoding Format                   ... The type of SHEF-Encoding (See SHEF Code Manual)
Use header text                   ... If using a header for the SHEF-Encoded file, check the box and enter the header in the edit field
Output Filename                   ... The name of the file to be generated
Local Output Directory            ... The name of the directory on the local computer to place the SHEF file in
Target Directory                  ... The name of the directory on the target computer to place the SHEF file in
Append Date/Time to Output File   ... Checking this box will append the date/time to the output file in the form yy.mm.dd.hh.mn
Include Out-Of-Period Data        ... Checking this box will cause atleast one sensor reading for an ID to be included, even if outside of time period
Always Send Data                  ... Checking this box will force the sending of the SHEF-Encoded product even if no data
Test Generating a SHEF Product    ... Clicking this button will generate a SHEF-Encoded file for the current target number.
The Sensor List and Types Columns ... Self explanatory
The steps to setting up reports containing SHEF-Encoded data are below (you will need to familiarize yourself with SHEF before proceeding):
(Remember that SHEF ID's are assigned by government agencies)
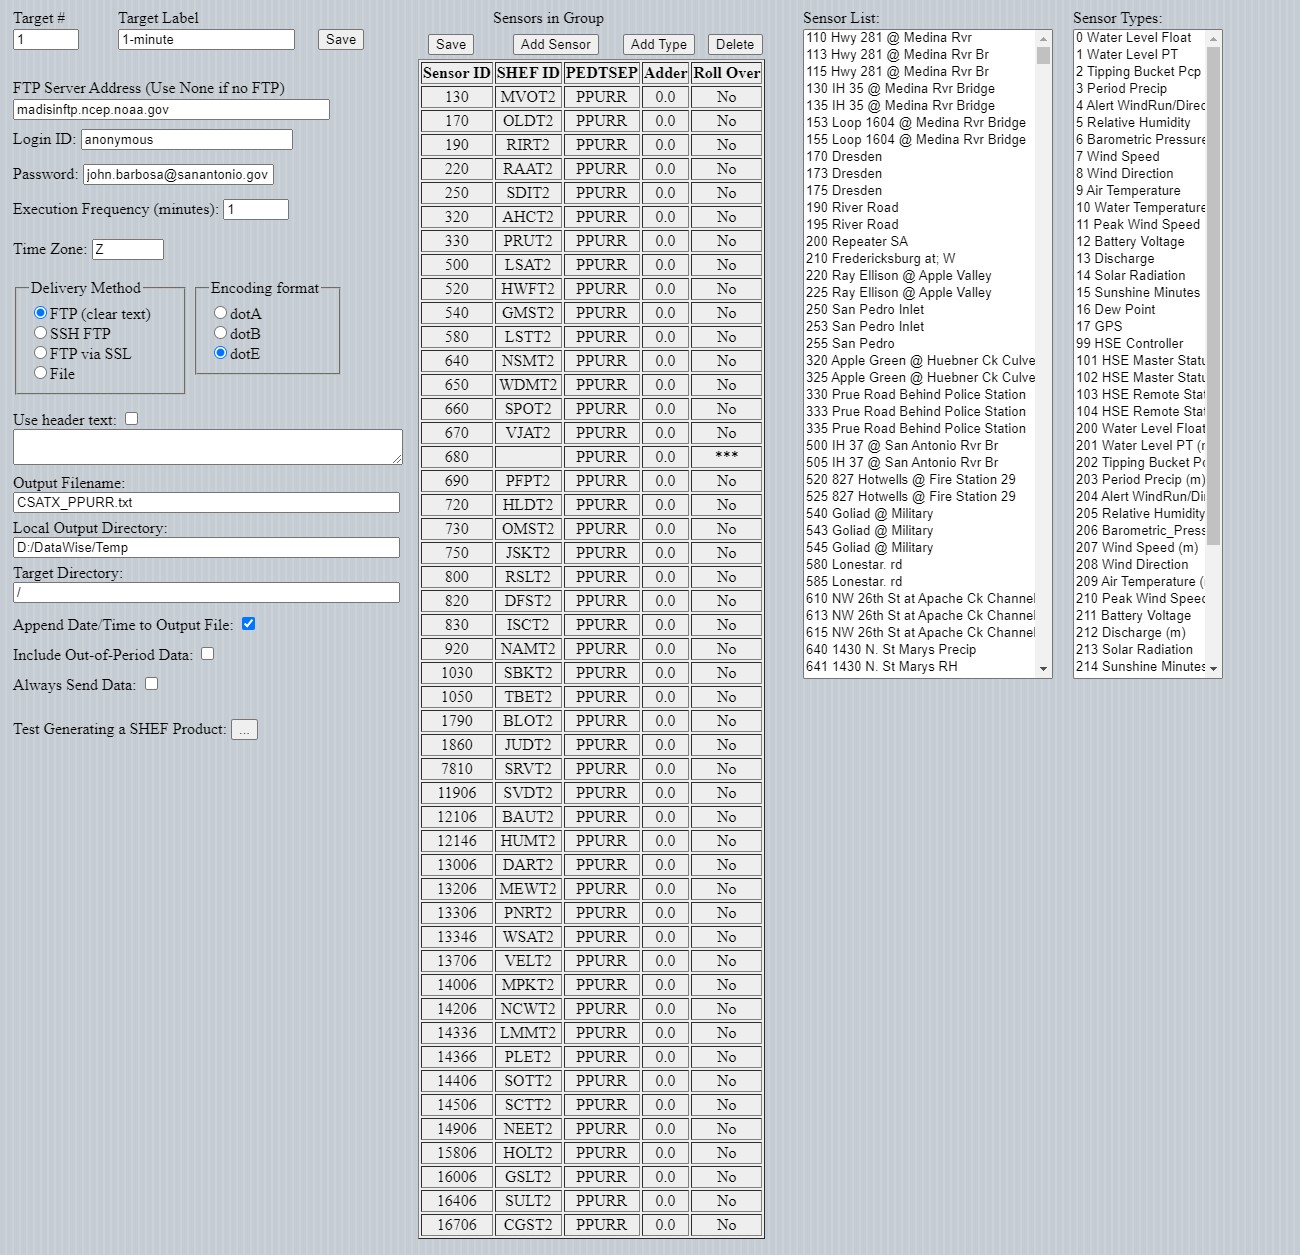
A completed setup screen will look similar to the image below.